Kitchen kit part 1: the easiest way to cut up a pepper
")
How do you build up the tools of your kitchen? Which items are indispensable and how many gadgets have you consigned to the car-boot sale?
I arrived in Saudi Arabia in 1995 with my life packed into a couple of suitcases. My furniture, books and some precious items were in storage. Everything else had been disposed of including most of my fairly basic kitchen implements. I’d spent the first year of my married life living in Bath while my husband started a new job in Jeddah. I quit my job and joined him once we decided that this was a permanent move and exchanged a life of freedom, and to all intents and purposes that of a single woman, for one of complete dependence.
")
Furthermore, for reasons I won’t go into here, I was to share my new apartment with KP (said husband) and P, another chap from the rugby club. P and KP had also been living a batchelor-style life consisting mainly of sport and socialising. I walked into the kitchen and they proudly showed me the extra plate, knife, fork and spoon that they had bought in my honour (taking the total from two to three!). A few pans, a knife, a wooden spoon and a colander were my batterie de cuisine.
This is a sobering thought when I look at my bulging kitchen cupboards of stuff collected over the last 16 years. What would I take in my suitcase as essential items if starting again? This prompted the first in an occasional series about my favourite gadgets or implements.
")
Those early days in Saudi were ones of leisure, seclusion and borrowed time (I was expecting my first child). I did something that felt elicit and watched some daytime American cookery shows. They may have been in English but the presenters spoke another language and introduced ingredients and gadgets I had never heard of. Two shows stood out – Caprial’s Cafe and Biba’s Italian kitchen.
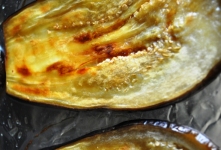
Caprial was the Delia Smith of Portland, Oregon and explained things very precisely including how to cut up a pepper (or capsicum). I’ve been following this method for so long that I can’t remember how I did it before but I know that I got the seeds everywhere. Believe me, if you’ve ever had problems this is the only way to go.
To cut anything properly you need a good knife and this is my ultimate kitchen gadget. A well-balanced cooks knife can be used for chopping, slicing, paring and the heel of the knife for crushing the skins from garlic cloves. I bought my Zwilling J.A. Henkels cooks knife from Kitchens in Bath about 15 years ago, it cost £60 and I use it everyday. KP bought me a Global vegetable knife for Christmas which I also like but one good knife is all you need.
How to chop a pepper
- Stand the pepper upright on a board. Think of it like a box with four sides.
- Holding it steady with one hand, slice off one side of the box.
- Turn the pepper a quarter turn and slice of the next side (from top to bottom) avoiding the core.
- Repeat until all four sides have been cut off (if the pepper has a wobbly base you might have to lie it on its side). You will be left with the core and four pieces.
- Remove any white pith from the inside of the slices with a paring knife.
- You can now slice or chop into any sized pieces you like.
")
")
Try it. Happy to answer any questions below on the ‘pepper chopping help line’ comments section. If you have ever struggled with a pepper these days are over. Trust me.
In Kitchen, Nigella dedicates a whole chapter to stuff she’s chucked! Emily Shardlow mentioned her faves and fails in The National. Is there a gadget you can’t live without (or threw away with gusto)?
Ginger chocolate biscuits
")
There are some things, that you eat quite happily, then you taste homemade and there’s no going back. Biscuits (or cookies if you prefer) are a good case in point. Although I munch occasionally on a digestive or a bourbon they are a poor relation to the crumbly or chewy morsels that, with very little effort, can emerge from your oven in a short space of time.
Take these chewy ginger chocolate cookies from Joy the Baker for instance. The most arduous part of the recipe is rolling out the dough into balls, but that’s the soothing therapeutic nature of cooking for me (plus I had the audio version of Wolf Hall by Hilary Mantel keeping me riveted).

I won’t republish the whole recipe – pop over to Joy for that. But I have converted the ingredients list for people like me who prefer scales to volume. I could actually have a little rant about why weighing is preferable to measuring but Ms Marmite Lover has done it far better than me. In addition to the main argument about consistency and accuracy, I would add that it makes such a mess trying to ladle out an exact cupful of flour or sugar from the bag (and much more washing up).

Anyway, whichever method you choose, do try these. My biscuits have always emerged crisp rather than chewy after 12 minutes but are none the worse for that. I took them to our UAE food blogger picnic and they got the seal of approval. Need I say more?
")
Sssshhhhh...don't wake Hazel
Chocolate ginger biscuits (for full recipe visit Joy the Baker)
Makes 48 biscuits
340g plain flour
2 teaspoons bicarbonate of soda
1/4 teaspoon salt
1 teaspoon ground cinnamon
1 teaspoon ground ginger
1/2 teaspoon ground cloves
155g unsalted butter, softened
185g light brown sugar
1 large egg (55g if you are interested!)
Approx 83g molasses or treacle
Approx 60g dark chocolate chips (or chopped chocolate 70% cocoa solids)
Approx 75g granulated sugar, for rolling dough balls
The oven temperature is 180C
-
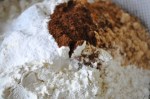
- Weigh out the flour & spices (or measure if that floats your boat!)
-

- Chopped chocolate measured
-

- Pouring in the treacle (warm the spoon first)
-
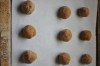
- Roll mixture into balls
-
- Space out on the baking sheet
-

- Keep an eye – one more minute can mean crisp not chewy
-

- Leave to cool completely before storing
-

- Ginger chocolate biscuits are great with tea
To quote Ms Marmite lover, ‘Are you comfortable with cups? Or do you groove to grams? How do you measure up?’ And what ‘bought’ goods have you made at home that have been a revelation? Let me know.
What kind of picnicker are you?

Friday is the main non-working day in Dubai and while the weather is good many people flock to the parks on the weekends to relax with their families. Safa Park is a popular destination of about 160 acres of greenery, palm trees, flower beds and lakes. I’m always fascinated by the various picnics that are brought; often women sit in the circle of deck chairs round skewering meat for kebabs to barbecue; I’ve seen enormous cooking pots, covered with foil, hoisted over the railings; Arabic families sometimes bring a drum and children munch from enormous bags of crisps accompanied by intoxicating rhythms.
So what happens when a group of friends who all blog about food get together for a picnic? I thought I was pretty normal bringing my picnic backpack, with plates, knives, forks and a tablecloth plus flask of tea (and National Trust rug!) but this brought gales of laughter from Arva. I suppose I can’t hide my English roots. Sandy impressed us all by producing a fold-up table which she’d transported across the park along with food and toddler in buggy. Anja iced her cake in situ and Sarah brought her goodies in stackable Chinese steamer baskets (practical and oh so stylish).

The picnic spread was fantastic including courgette and chocolate cake from Edwina, raspberry and hazelnut cake from Sukaina, corn muffins from Sid, preserved homegrown tomatoes from Lin and other goodies from Yasmin, Salman and Kari.
There was a concert (my daughter was playing bass clarinet) in the amphitheatre behind us, the music loud enough to enjoy but far enough away to be able to chat and munch as we sat under the shade of the trees.

My contribution to the picnic were these little spiced butternut squash and parsley frittatas plus some ginger chocolate cookies (recipe to follow soon). The weather is starting to get warmer here in Dubai so we are all savouring every moment outdoors before the summer heat makes daytime picnics unbearable. I transported the frittatas in their tin pretty much straight from the oven – I’d recommend cooling before transport under normal circumstances. They were perfect picnic food.
These frittatas were a combination of Jamie Oliver’s spiced squash recipe plus some inspiration from Donna Hay (and the ingredients I had in the cupboard). For more pics and who brought what go over to Spontaneous Euphoria and Out and About in Dubai
")
Little spiced butternut and parsley frittatas
Ingredients
1/2 a butternut squash (about 700g)
2 teaspoons coriander seeds
2 teaspoons dried oregano
1/2 teaspoon fennel seeds
2 small dried chillies
1 teaspoon sea salt
1 teaspoon freshly ground black pepper
1 clove garlic
2 tablespoons olive oil
3 tablespoons of finely chopped flat leaf parsley
4 eggs, lightly beaten
240 ml single cream
40g Emmental cheese, grated
parmesan cheese
Method
Remove the seeds from the squash and cut lengthways into slices. Put the spices, herb and salt into a mortar and pound to a make a fairly fine powder, add the garlic clove and smash to combine. Add the oil and stir to make a paste. Smear over both sides of the slices of squash. Place in a baking tray lined with foil at 200 C for about 30 minutes (or until tender. Leave to cool and remove the skin from the flesh with a knife and cut into small dice and mix with the parsley.
Combine the eggs, cream, freshly ground black pepper and Emmental cheese and whisk to combine. Pour the mixture into 12 greased muffin tins. Divide the squash mixture into the tins. Bake at 160 C for 20 minutes until they are golden and firm to the touch.

So what kind of picnicker are you? Paper plates and sitting on the grass or wicker hampers and folding chairs?
Slow food, quick loaf

Difficult choices about buying food – I think we all have them these days. I would like to buy local – but I live in a desert. Nearer doesn’t always mean best. Take lovely fresh bunches of local herbs; they disappeared from our shelves temporarily a few months ago due to toxic levels of chemical being detected. It makes you wonder what’s not detected. On the plus side, there is a small farmer’s market once a week during the cooler months of the year but the range is naturally limited.
Eggs are a quandary. Local means battery farmed from ominous looking sheds that line the back roads of the Emirates. Organic, free-range means air-freighting, food miles, a compromise on freshness, not to mention the price. Even home-grown herbs and tomatoes, which I plant every year, use imported potting soil and desalinated irrigation. Don’t get me wrong. As an expat I know I am supremely lucky here in Dubai to be able to buy almost any ingredient that I want, but in an ideal world I’d swap for less choice but fresher, locally sourced products grown or made with care.
")
This preamble is because Helen from Fuss Free Flavours asked us to bake with locally milled flour by a named producer this month for the Fresh From the Oven challenge in support of the Slow Food movement. I chose Dove’s Farm organic ethical flour (affordable from Organic Foods & Cafe, but not when air-freighted by Choitrams). Locally milled flour from local flour mills is available, but I didn’t think these rather anonymous suppliers fitted with the spirit of Helen’s challenge:
My challenge is to bake something yeasted, using flour where you know either where it was grown or where it was milled.
Lets celebrate specific named farmers, farms and millers this month!
If I had a magic wand, I would bring the flour ground at Cothele Mill in Cornwall. This is one of my favourite National Trust properties and they have restored the mill (operated by a water wheel) to produce flour.
")
Instant mashed potato granules must be the antithesis of slow food, but when it was launched to the British public in the 1970s the words ‘modern’ and ‘labour-saving’ were very attractive to my parents’ generation; the space programme was in full swing. We had three television channels to choose from and only one was commercial so as children we grew up singing the ad tunes. The Cadbury’s Smash ad (see below) was one of our favourites and still makes me chuckle.
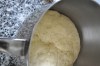
However, you can’t get much slower than sour dough and I’ve embarked on the leaven-making process from Dan Lepard‘s The Handmade Loaf. In the meantime we needed bread in less than a few days so I decided to become a Domestic Goddess if only in my imagination and used a Nigella recipe from her eponymous book. It was a very easy, satisfying loaf to make with a lovely texture.
Confession time – I used a couple of tablespoons of Cadbury’s Smash (as La Lawson also suggested) . Click here if you are wondering why I have instant mashed potato flour in my cupboard (that Nigella is a bad influence).
")
The essential white loaf – adapted from a recipe by Nigella Lawson in How to be a domestic goddess
Ingredients
500g strong white bread flour, plus extra for dusting the work surface
7g easy-blend or fast-action yeast or 15 g fresh yeast
1 tablespoon sea salt
about 300ml of warm water, potato-cooking water (or add 2 level tablespoons of instant mashed potato granules to the water)
1 tablespoon unsalted butter, softened
If using easy blend or fresh yeast, dissolve it in 200ml of the water. Put the flour and salt (and easy-blend yeast if using) in a large bowl, make a well in the middle and pour in the water. Mix by hand or with a wooden spoon until the dough comes together in a loose mass (Nigella describes as shaggy) – add more water if you need to. Mix in the butter and turn out the dough and knead on a floured surface (or use a machine with a dough hook). Knead for about 10 minutes until the dough is smooth and elastic.
Lightly oil the inside of a large bowl, form the dough into a ball and place inside, turning the dough once. Cover with clingfilm and leave to prove in a warm place for about an hour (although it might take 2). The dough should double in size. You can also leave to prove overnight in the fridge.
Switch on the oven. Knock back the dough, shape into a round and put on a baking sheet lined with baking parchment (or into a loaf tin), cover loosely with oiled cling film or a tea towel and leave for about 30 minutes until nearly doubled in size again. Slash the top with a blade or extremely sharp knife (if you like) and put in an oven preheated to 220 C. For a good crust, give a few squirts of water from a squeezy bottle into the hot oven.
Bake for 35 minutes or until the loaf sounds hollow when you knock with your fist on its base. Leave to cool on a wire rack.
And eat with…..unsalted butter or fresh tomatoes or home-made jam or sliced thinly and filled with cucumber or cold roast chicken, rocket and lemon mayonnaise or….well what would you eat with freshly made bread?
Homemade rose creams – think pink
")
What was I thinking of when I gave my sugar-addict 12 year-old daughter a sweet making recipe book for Christmas? Was it a case of displaced present-giving (when you buy something you want for a member of your family)? Or an urge to shop in my comfort-zone (as exhibited by my husband when he bought me a putter for my birthday after I’d had three golf lessons)? Or perhaps nostalgia?
My most avidly read non-fiction when I was 12, was a cook book called ‘How to make sweets’ and I think it was by Marguerite Patten. This plain-looking paperback with no pictures stimulated my childish cooking imagination. I remember talking my lovely Gran into letting me attempt toffee-making in her kitchen but ended up with a treacley mess. Sweet-making is much more difficult than you imagine, especially without the right equipment (a sugar thermometer being top of the list). The fall-back, no-cook recipe that my sister and I made most often were peppermint creams. A dough made of icing sugar bound with egg white, a drop of peppermint essence and some green food colouring, rolled out and stamped into hundreds of little rounds with an apple corer.

My own daughter is much more ambitious than I was and turned browsing into action pretty quickly after receiving the book. I was presented with a long shopping list and the kitchen commandeered until I had to put a limit on the amount that she was allowed to make in one week. I tried to channel this enthusiasm by suggesting a home-made sweet stall at her school Spring Fair which I’ll tell you about some other time.
One of the first recipes she made though, was actually a more luxurious version of our old favourite. Rose creams have a boudoir kind of name and make you want to drape yourself over a velvet chaise longue to nibble one.. or two… or three.
My daughter made these unsupervised by me. She did a good job of making them didn’t she? They would make a superb gift if going out for dinner or just an indulgent treat at home. And if you eschew soft centres in a box of chocolates (like I do – orange creams – yuk) let me tell you these are nothing like. Be warned of their addictive nature (oh and dogs like the look of them too!).
")
If you have a penchant for pinkness you might like to pop over and visit Sarah at Maison Cupcake who is hosting this month’s Mingle themed ‘Think Pink’ (brainchild of Meeta of What’s for lunch, Honey?
Rose creams – slightly adapted from Life is Sweet by Hope and Greenwood*
Makes 20 rose creams
Ingredients
- 3 tablespoons double cream
- Pink (rose) gel food colouring
- 3 tablespoons rose syrup
- 275g (10oz) icing sugar
- 200g (7oz) good quality,dark chocolate, broken into small bits
- 1 teaspoon groundnut oil
Method
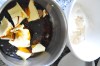
- Place the double cream, a small dab of pink food colouring and the rose syrup into a bowl and mix well. Sift the icing sugar over the cream mixture and stir to combine. Tip the mixture out onto a work surface lightly dusted with icing sugar and knead the fondant with your hands until it all comes together in a firm ball (add more icing sugar if necessary). Place in the fridge for about 30 minutes.
- Using your hands, roll 20 teaspoon-sized lumps of mixture into balls, then flatten them slightly and place on a plate. Heat 5cm (2in) of water in a pan. Pop a heatproof bowl on top, making sure that the bottom of the bowl is not touching the water. Place the dark chocolate and the groundnut oil in the bowl and warm until melted. Remove from the heat and cool for 10 minutes.
- Line a large, flat baking sheet with baking parchment. Carefully take a fondant ball, one at a time, and, using two forks, dip it in the melted chocolate until coated all over. Do this quickly, as you don’t want to melt the fondant. Place the coated fondant ball onto the baking parchment. Leave to cool and set in a cool place.
*Read Leotie Lovely’s very entertaining interview with Miss Hope.
What were your favourite childhood sweets (or candy if that makes more sense where you live)?
Involtini – a pine nut cloaking device
")
I’ve been trying to make vegetarian meals more often so that I don’t have to cook two different things in the evening (my 12-year-old daughter has not eaten meat for about 6 years). Finding something that will please all and venture outside the core rota of recipes that I serve up regularly is not an easy task. “Ugh feta” said KP as he saw me preparing the filling before work. Neither he nor my older daughter like pine nuts (unless buried in pesto) and my younger one has an aversion to aubergines (and quite a long list of other vegetables which is difficult as she is the vegetarian). Not a natural optimist in some areas of my life, but in the kitchen I refuse to give up. My sister and I ate everything after all!
An involtini recipe (involta means wrapped in Italian) is in the ‘Meatless Feasts‘ chapter in Nigella Lawson’s Feast cookery book. I followed the ingredients list fairly closely, retaining the problematic aubergines, feta cheese and pine nuts, but knew that raisins would not be tolerated (and dried tea-leaves mint is abominable). I sneaked in a chilli to keep everyone happy. The method and quantities are mine, the former made a lot less time-consuming than Nigella’s (this was written pre-Express days).
")
And the verdict; KP forgot about the feta, aubergine was eaten by all (albeit begrudgingly by one) and pine nuts stayed well under the radar. Clean plates all round. A success in my book for a mid-week meal and this would be great for a crowd (especially as you could make this in stages and assemble the dish ahead of time, keeping it in the fridge until ready to bake).

Involtini – adapted from Feast by Nigella Lawson (printable version here)
Serves 4 amply
Ingredients
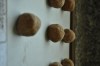
2 large aubergines cut lengthways into slices about 5 mm thick (makes about 14 slices)
olive oil
1 bottle of passata
1 ball of mozzarella
Stuffing ingredients
100g feta cheese, torn into a few pieces
1 ball mozzarella, roughly chopped
25g parmesan, grated
60g pine nuts
dash of olive oil
5 tablespoons breadcrumbs
1 garlic clove, roughly chopped
zest of one lemon and 1-2 tablespoons of juice
half a large bunch of flat-leaf parsley leaves, roughly chopped
1 small red chilli, deseeded and roughly chopped
black pepper

Method
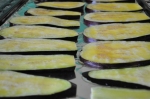
Line a grill pan with foil and as you slice the aubergines paint them on both sides with a light coating of olive oil. Place under a medium grill, turning halfway until they are cooked through (soft) and brown (not burned). If you need to do them in batches layer them between greaseproof paper to cool.
Put all the stuffing ingredients into a food processor and whizz in bursts until the filling comes together and the pine nuts are as chunky or as smooth as you like.
When the aubergine slices have cooled, lay them one at a time, larger end towards you, on your surface. Put a generous tablespoonful of filling at the broad end (I give it a pinch to make into a sausage shape). Then roll up quite tightly and place the rolls into a lightly greased ovenproof dish (seam side down) where they will fit snugly.
Pour over the passata, thinned with a little water (or a home-made tomato sauce), grind over some black pepper and salt, tear up the mozzarella and scatter over the top. Bake in a preheated oven of 190C for about 30 minutes. Rest for at least 10 minutes before serving (I think this also reheats well – I had it as a luxurious lunch the next dat).
-
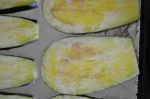
- Slice the aubergines
-
- and lightly brush with olive oil
-
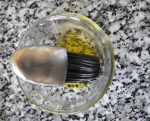
- Don’t use a bristle brush if you can help it
-
- Grill until soft and golden on both sides
-
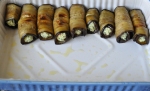
- Roll up around the filling
-

- Fit them snugly
-

- …in the right dish!
-

- Bake with the passata and mozzarella
-
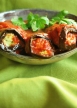
- Three per person is usually plenty
Serve with a fresh green salad (bitter leaves such as endive or spinach would go well), some crusty bread and a luscious red super-Tuscan (if you fancy). ‘Ciao Italia’ is a super round-up of Italian inspired, Nigella inspired recipes at Maison Cupcake. Sorry, I didn’t fling a silk scarf round my hair and get on the back of a Vespa; you’d take your life in your hands if you did this on Dubai roads (although KP dreams of Vespa ownership since I ‘persuaded’ him against a Harley). I did find a holiday company where you can tour round Italy on one – Italy by Vespa !
A tale of tomatoes
…and Madhur Jaffrey’s tomato-lentil soup.

Well this is embarrassing. I went to take a picture of the last few remaining spoonfuls of tomato and lentil soup and found that my husband had taken it off to work for his lunch. It wasn’t the most photogenic soup to be honest but the layers of spicy, rich flavours meant that it lasted for one supper only with bowls wiped clean with crusty bread.
The recipe is from Madhur Jaffrey’s newest cook book Curry Easy which I bought at the Emirates Festival of Literature last weekend. But this story really starts with tomatoes. My aforementioned husband, KP, makes a brave effort to grow tomatoes every year. Despite the fact that buying the potting compost and seeds, planting, staking and feeding are usually done by someone else he shows off ‘my tomatoes’ to anyone who has the misfortune to put a toe into our garden when he’s around. Sadly, mainly due to our garden facing North, ‘our’ tomato growing history has been patchy. This year however, KP has stepped up the ante and has been very hands-on with the plants; pruning, tying and even whispering encouragement to them himself. He has even extended this tomato-growing onto his office balcony. Fruit has emerged and each specimen that ripens is paraded round the house and eaten with relish (see picture above). Until, that is, my Twitter friend @boozychef sent me a Twitpic of her harvest. KP was crestfallen. She sent more pics; he was in agony.

When we met up for the Madhur Jaffrey cookery demonstration she thrust a bulging bag of luscious ripe tomatoes into my hands ‘for KP’.
Madhur Jaffrey was bustling about finishing preparations for her demo. The set up had been fraught with technical problems so things were whisked away to the hotel ovens, but she remained serene. It was as though she was in a her own kitchen at home and she was chatting to friends, albeit 300 of us.
She explained the rationale behind her new book. Her life, like all our lives, was too busy for her to cook traditional Indian food with all the browning (bhuno means brown), “browning the spices, browning the onions, browning the meat”. She travelled through India, Pakistan, Bangladesh and Sri Lanka looking for simpler recipes and adapted cooking techniques to make them “just as good, but simpler” while still achieving an authentic taste. “We all look for a way to avoid the dreaded bhuno-ing” she quipped.

The basis for many of her new recipes and the baked paté kebabs she demonstrated, is to marinate the meat in the fridge with all the seasonings and oven cook it in a deep baking tray. She plated this up very elegantly with Peshawari red pepper chutney, onions rings (finely sliced, soaked in water and dried) and mint leaves.
The next dish was prawns with chilli and garlic. “I asked for jumbo prawns, but these are really jumbo” she laughed holding up some enormous specimens. ” This is Dubai – like Texas..these are master prawns!”
She warned several times about adding too much salt, then we all laughed as she seemed to add a huge amount. Questions to her included whether Indians de-seed their chillies (“no”) and whether it is bad to use ‘lazy’ ginger and garlic in jars “yes, very bad as preservative like vinegar is also used which upsets the balance of the dish. There is nothing like fresh ginger, just grate it. I often get my husband to do it for me…so find someone!”

We all rushed forward at the end of this thoroughly entertaining session eagerly hoping for a morsel as Madhur’s cooking scents had wafted toward us seductively. Alas after a couple of photos she was whisked away for book signings and the food had disappeared. All that remained was the single plated kebab portion. “Can we eat that then?” I asked gingerly ” oh yes, said the assistant.” I hesitated (how could I be the only person in 300 to taste Mrs Jaffrey’s cooking?) and was lost. @boozychef leaned over and popped it into her mouth in one bite. She declared it delicious (and not too salty either much to our astonishment).
I’ve cooked several things already from this book (@boozychef kindly braved the queues to have my copy signed) and it’s already a great source of everyday meals. With the soup I have tinkered even further with Madhur’s method. To me there is nothing easy about pushing things through a sieve which she recommends to separate the whole spices. To keep the excellent taste but achieve a nice texture I advise you to get one of those tea leaf devices on a chain to keep the whole spices separate but immersed. And if you are not lucky enough to have home-grown tomatoes try to get the ripest you can find.

Tomato-lentil soup adapted slightly from Madhur Jaffrey’s Curry Easy
Serves 4
Ingredients
800g tomatoes chopped
100g red lentils
475ml chicken stock or water (I used Marigold Swiss Bouillon vegetable stock)
1 tablespoon whole coriander seeds
1 teaspoon whole cumin seeds
1/4 teaspoon ground turmeric
1/2 teaspoon cayenne pepper
1 small to medium onion finely chopped
2.5cm piece of fresh ginger, peeled and chopped
1 handful fresh coriander
10-15 fresh curry leaves
1 teaspoon sea salt
Put the whole spices, curry leaves and ginger into a tea-infuser. Put all the rest of the ingredients, except the salt, into a pan and bring to a simmer. Immerse the tea-infuser into the soup. Cover partially, turn the heat to low and simmer very gently for an hour.
Add the salt, stir and taste. Remove the infuser and with a fork lift out as many of the tomato skins as you can (or have the patience for). Mash gently with a potato masher or blend in bursts with a stick blender if you like your soup slightly smoother but make sure you retain some texture. Reheat before serving if necessary, while stirring.
Thank you, thank you @boozychef. I think you should be guest posting on the DXB Gardener.
What are your tips for growing tomatoes (especially in the UAE)?

Taste of Dubai and gingerbread cake
")
Italian food writer Anna del Conte said recently (on Desert Island Discs) ‘Italians want the same food made only better and better’. Her desert island dish would be pasta with a good tomato sauce. I relate to this and find the constant novelty and drive to create a unique or different dish is often at the expense of relevant flavours and taste. Perhaps this is why I had never visited the annual, much-publicised ‘Taste of Dubai‘ event before, put off by the thought of many chefs showing off fancy food. This was about to change.
First stop was an encounter with Brit s’leb chef Gary Rhodes who has two restaurants in Dubai which regularly get oohs and aahs from my more generously-walleted friends. The now-less-spiky-haired chef was charming and enthused about his plan to combine Arabic classic dishes with French-style cooking.
As I was working at the Beverage Theatre at Taste of Dubai I only managed a few forays out to sample dishes from the stands, browse the food items on sale and mingle with the relaxed crowds of foodies who were enjoying the music and atmosphere. Alas, the best dishes were not to be had at Gary’s Rhodes Twenty10 stall; frankly the white tomato soup was a bit weird to my taste (the underlying creaminess tasted a bit UHT to me) and the truffled macaroni cheese was just ok, however I was impressed to see the man himself dash out from the kitchens heaving a cauldron of soup proving he is ‘hands-on’.

The Mango Tree provided really excellent Thai fish cakes but the Pad Thai noodles were a bit bland (which is not the case in the restaurant itself when I went with Samantha, Arva, Devina and Yasmin and other foodies for lunch).
The highlight for me was Al Hambra – a Spanish restaurant in Mina A’ Salam. You could tuck into their olives and marinated manchego cheese while waiting and all dishes were accompanied by home-made, warm rolls (other stalls take note). Patatas bravas, spicy meatballs, fragrant gambas… I tried them all and went back for more. The churros with cinnamon ice-cream and chocolate sauce were divine (and only 15 AED).

As the renowned beef cheeks were sold out, I had an exquisite morsel of salmon with sour cream mousse from Gordon R’s Verre. Finally, I met some friends who were too full to finish a scotch egg from The Wharf. I quickly obliged – the crisp crust around peppery game meat and a semi-soft boiled egg was perfect (although strangely not on their restaurant menu).
The scotch egg was exactly the type of British food I would have expected from Gary; at home I reached for Rhodes around Britain and it fell open at the most well-thumbed recipe – Gingerbread cake. Simple, warming, comforting baking. ‘Taste of Dubai’ is something I’ll return to next year for sure, but ‘Taste of Home-cooking’ will sustain me in the meantime.

Gingerbread cake – slightly adapted from Gary Rhodes – Rhodes Around Britain
This can also be served warm as a pudding, with custard of course.
Ingredients
225g (8 oz) self-raising flour
2 heaped teaspoons of ground ginger
A pinch of salt
100 g (4 oz) soft brown sugar
100 g (4 oz) unsalted butter
100 g (4 oz) treacle (molasses)
175 g (6 oz) golden syrup (light corn syrup)
1 egg
150 ml (5 fl oz) milk
- Pre-heat the oven to 180 C (350 F or Gas 4). Grease and line a 900 g (2 lb) loaf tin.
- Sift together the flour and ginger in a bowl then add the salt.
- Warm the sugar, butter, treacle and golden syrup in a pan over a low to medium heat.
- Beat the egg with the milk then add it slowly to the dry ingredients mixing to get a stiff batter. The add the melted ingredients mixing thoroughly with a wooden spoon.
- Pour the mixture into the tin.
- Bake for 45 minutes – 1 hour, until a skewer inserted in the middle comes out clean.
- If serving cold, leave to cool in the tin.
-

- My vegetarian daughter was very alarmed by this duck
-

- Baskets of dim sum
-

- Sweet treats from Almaz by Momo
-

- The Carluccio stall
-

- A demonstration of food processors
-

- The gambas at Al Hambra
-

- Chef at Al Hambra stand serving meatballs
-

- Salmon with sour cream mousse from Verre
-
- The ingredients for gingerbread cake
-

- Pour the mixture into a tin (I made double the recipe)
-

- Scraped out mixing bowl
-
- Leave to cool in the tin or serve warm with custard
Champion challah (fresh from the oven)

Home-made bread. What a comforting, mellow feeling that short sentence provokes. The warm, yeasty smell permeating the house, the pleasure of tearing off a hunk, dabbing on some butter which melts slightly, the enthusiasm with which it is eaten by family and friends.
Brioche didn’t quite fall into the kitchen disasters camp, but having dreamt of a rich, domed loaf which would look like it came from the best French boulangerie, the rather pathetic result which was only good for toast was disappointing.
")
It’s better than any perfumed candle or room scent to bathe the whole house in a glorious aroma – this is good mood food. Challah stales quite quickly but makes fabulous French toast or posh bread and butter pudding (with apricot jam).
")
-

- Mix the milk, melted butter and yeast together
-
- Leave to prove
-

- Roll and lay in a star shape
-

- Plait from the middle and tuck ends underneath
Grease a baking sheet or line with baking parchment. Knock back the dough and divide into three equal pieces (I used scales to get them even). Roll to shape each piece into a long strip for plaiting.
Lay two of the strips over the third to make a star shape and plait from the centre, tucking the ends under. Do this on the baking sheet, then cover with a tea towel and leave to rise for 30 minutes.
Brush with egg and bake in a hot oven at 190 C for 35 – 40 minutes or until golden and the loaf sounds hollow if you tap it.
")
What’s your most satisfying baking achievement (or most disappointing binned failure)?
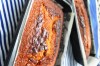
Nigeria in fiction and cassava chips

I agree with Mark Twain who said “Travel is fatal to prejudice, bigotry, and narrow-mindedness.”
However a holiday in Nigeria is probably not top of many people’s lists. It has an image problem; internet scams, violence and corruption. Undoubtedly some of this bad press is deserved but how do you find the truth about a country without going there?
Reading fiction is my prefered method and Chimamanda Ngozi Adichie has become one of my very favourite authors with her compelling and complex characters, moral questions and the impeccable craftmanship in her writing. She reveals many sides of Nigerian life in recent times (Purple Hibiscus) and during the Biafran war (Half of a Yellow Sun). I was lucky enough to hear her speak at the inaugural Emirates Airlines Festival of Literature in 2009. A voracious reader from childhood, she spoke of how she immersed herself in a world of English boarding schools and countryside adventures as portrayed in books by Enid Blyton, and fantasized about how she would eat potted meat sandwiches and drink ginger beer; two foodstuffs that were completely alien to her.

It’s a similar experience when I try to imagine what sort of food is eaten in Nigeria. Google doesn’t enlighten me much when I find a list of common Nigerian foods including ‘garri, egusi, amala, yam, plantain, indomie, pounded yam, banga soup paste, gbegiri, edikaekio and owo’. It sounds exotic but I’m still clueless, then find a lovely blog called Avartsy Cooking dedicated to Nigerian food with a comprehensive glossary (although one of Yetunde’s most recent posts, plantains and gizzards, will remain untested).
Another work of fiction, Chris Cleave’s The Other Hand, revolves around a violent incident in Nigeria and, to my mind, the country he portrays is very one-dimensional and reinforces the sense of brutality without offering much balance. Chris Cleave totally disarmed me as an engaging and likeable speaker at the Lit Fest in 2010 but I would have liked the chance to challenge him on this point.
")
At meetings with my bookclub, we try to link the food served to the title we are discussing. At The Other Hand discussion, our hostess Wasia started the evening by serving cassava chips which we devoured eagerly. They are slightly softer and sweeter than potato chips (fries) and their slight blandness seems to urge you to eat ‘just one more.’ Cassava is an edible starchy, tuberous root and, amazingly, the third largest source of carbohydrate eaten in the world. I say amazing as this was the first time my friends and I had ever eaten it. Nigeria is the world’s biggest producer of cassava where it is known as ege or ugburu. Did you know that tapioca comes from the cassava root?
A recipe for cassava chips is below (adapted from a mixture of Nigerian and Brazilian recipes I found online).
Sadly this ‘visit’ to Nigeria is the final stop in Foodalogues’ Culinary Tour around the world. Joan has taken us to Panama, Alaska, Turkey, Japan, Thailand and Egypt. Visit Foodalogue for a round-up of other recipes inspired by this virtual visit to Nigeria. I’ve really enjoyed finding out more about these countries through their ingredients and cuisines seen through different eyes and taking these journeys with you all.
The Lonely Planet guide says of Nigeria, ‘Challenging yet exuberant, this is Africa in the raw – there’s nowhere quite like it on the continent.’ Mark Twain would approve.
-

- Cassava roots
-
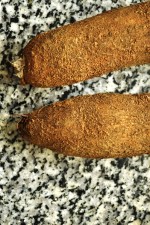
- This is the strange looking root in your supermarket
-
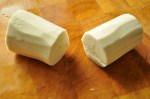
- Peel away all the dirty brown skin
-

- Cut into two or three chunks
-
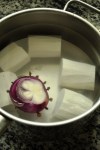
- Simmer until tender with a clove-studded onion
-

- Leave until cool enough to handle
-

- Remove the rope-like core
-
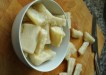
- Gently break into chips
-

- Eat them at hot as you can bear
Cassava chips
Ingredients
2-3 cassava roots
1 small onion
10 – 12 cloves
vegetable oil for frying
1 teaspoon sea salt
1 teaspoon caster sugar
1/2 teaspoon cinnamon
1/2 teaspoon smoked paprika (optional)
Method
Peel the cassava roots with a vegetable peeler until all the dark brown skin is removed. Cut into two or three large pieces and place into a pan of water. Peel the onion and use a cocktail stick to make holes into which you insert the cloves. Put the onion into the water with the cassava and bring to the boil. Simmer for about 15 minutes or until the cassava is tender. Drain and discard the onion. Gently break the cassava into chunky pieces (discard the rope-like core). Deep fry at 190 C until crisp and golden.
Drain, place onto kitchen towel to remove excess oil. Combine the salt, sugar and spices and sprinkle over the hot chips. If you like tomato ketchup with potato chips you’ll like it with these too.
Variation: After you have par-boiled the cassava and broken it into chips leave to cool for about five minutes. Drizzle with sunflower oil and sprinkle with a clove or two of crushed garlic, some chilli flakes and salt. Bake in the oven at 200C until golden.
Which country have you enjoyed visiting most?
")